 العربية
⬜ Tables Add-on – Managing Dining Tables in AurPOS
The Tables Add-on in AurPOS offers a simple and structured way to manage restaurant tables by Location. It helps staff link orders to specific tables during the sales process, improving order tracking, table service coordination, and the overall dining experience.
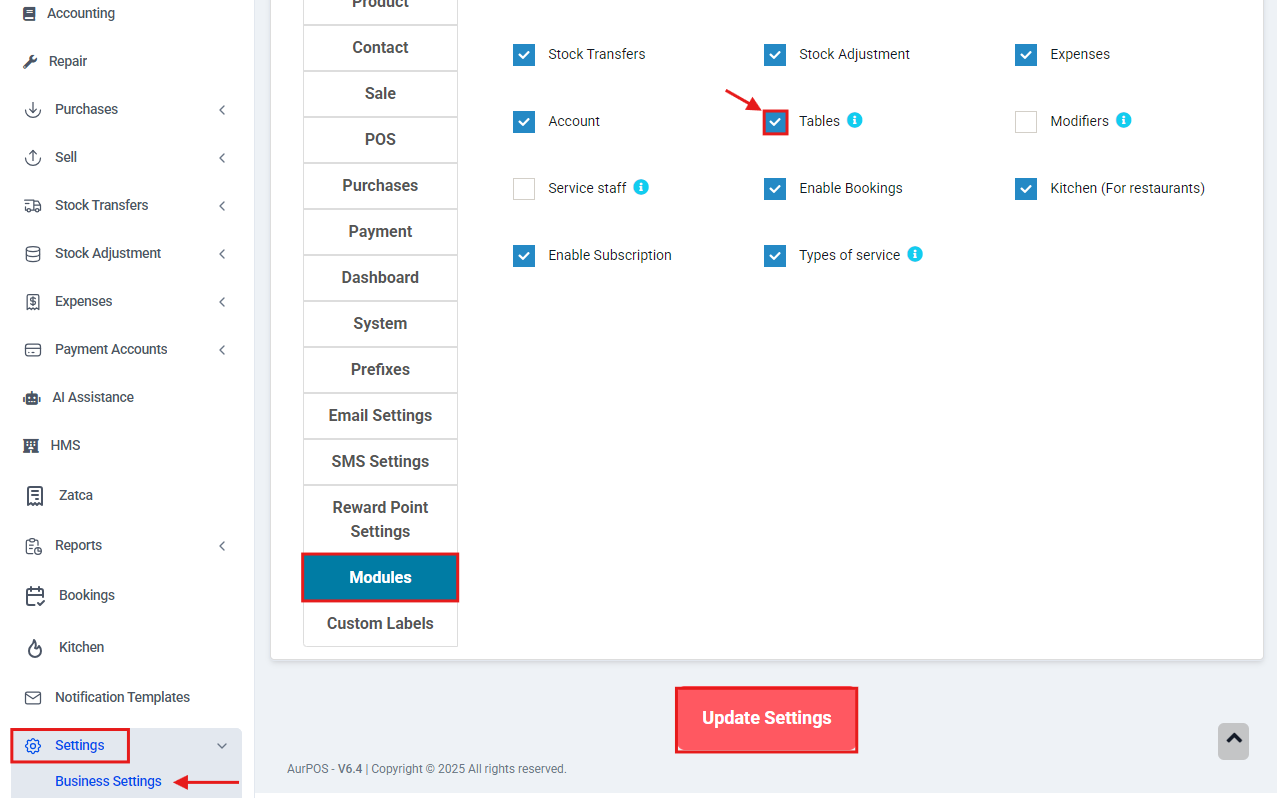
✅ How to Enable the Tables Feature:
-
Go to the Settings menu from the sidebar.
-
Click on Business Settings.
-
Open the Modules tab.
-
Enable the toggle for Tables.
Once activated, the "Tables" option will be available in the sidebar menu.
✅ How to Add a New Table:
-
Open the Tables screen from the sidebar.
-
Click the Add Table button.
-
Fill in the following details:
-
Table Name
-
Business Location the table belongs to
-
Description (optional – e.g., Indoor, Outdoor, VIP)
-
-
Click Save to confirm.
✅ Managing Tables:
In the Tables Management screen, you will see a full list of added tables. From this list, you can:
-
Edit table details such as name, branch, or description.
- Delete tables that are no longer in use.

✅ Using Tables in the POS Screen:
When placing orders through the POS screen:
-
First, select the Business Location (if you have access to multiple sites).
-
Once selected, only the tables linked to that location will appear.
-
You can then assign the order to the correct table.
⭐ Why Use the Tables Add-on?
-
Helps accurately assign and manage orders within the dining area.
-
Improves staff workflow and task distribution.
-
Enhances the guest experience through organized and faster service.